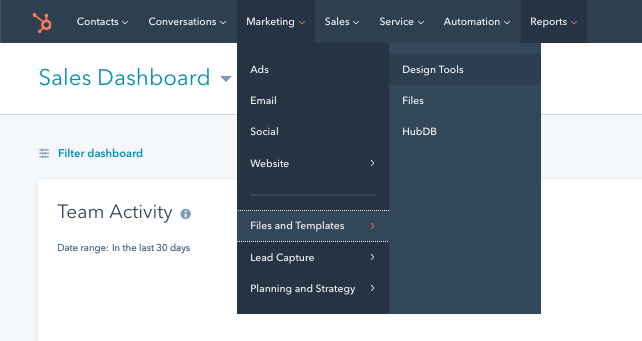
Part 1: Create cart summary module
Step 1:
Go to Hubspot Design Tools.
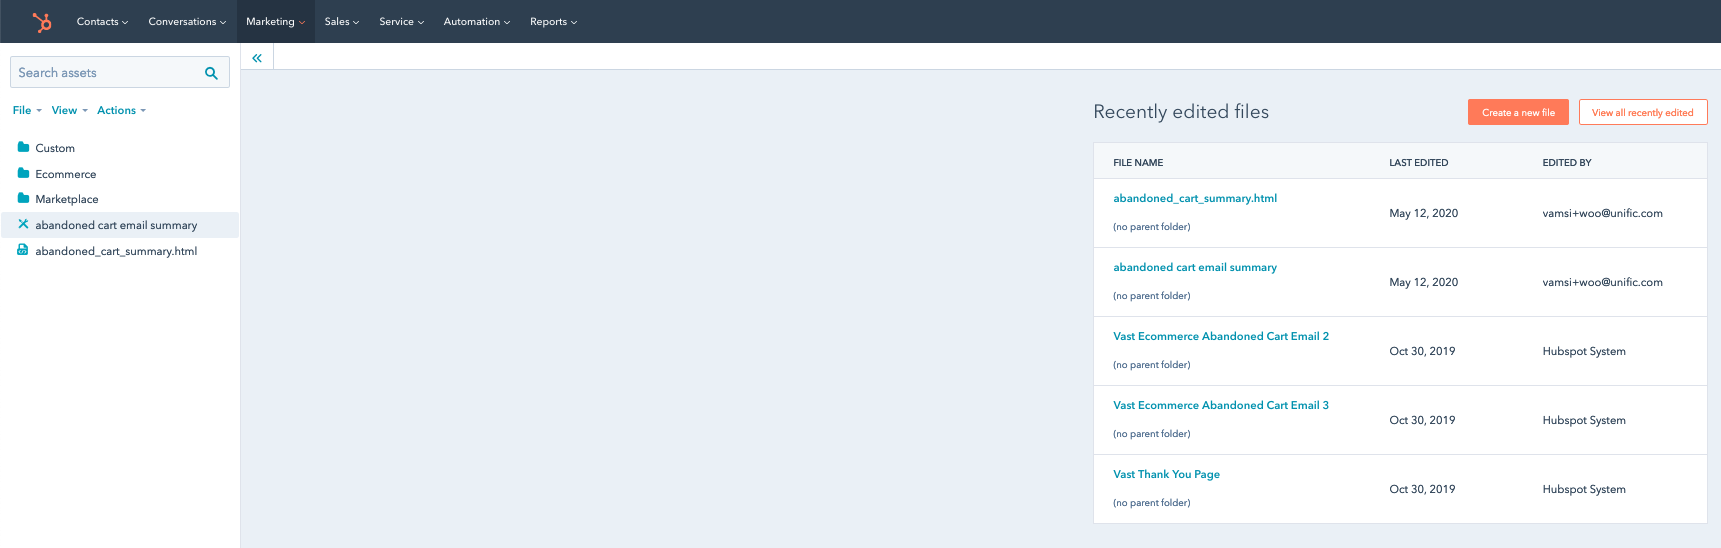
Step 2:
Create a new file.
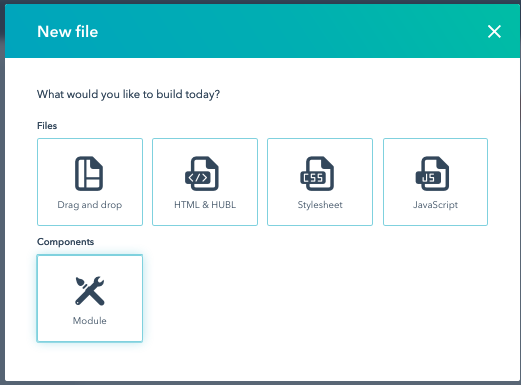
Step 3:
Select "Module".
Step 4:
Make module available to emails by checking box and give it a name.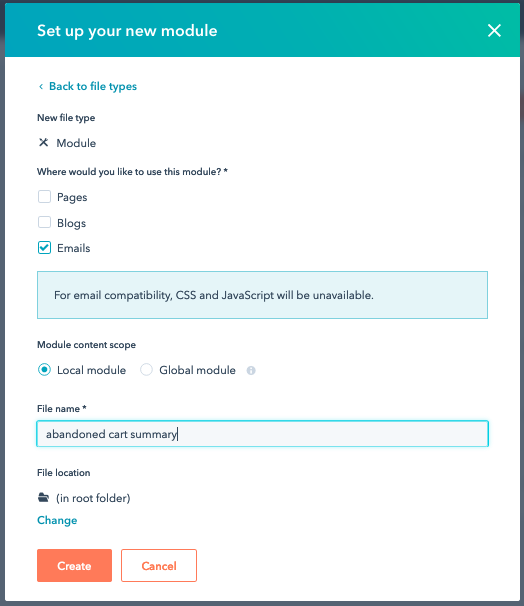
Step 5:
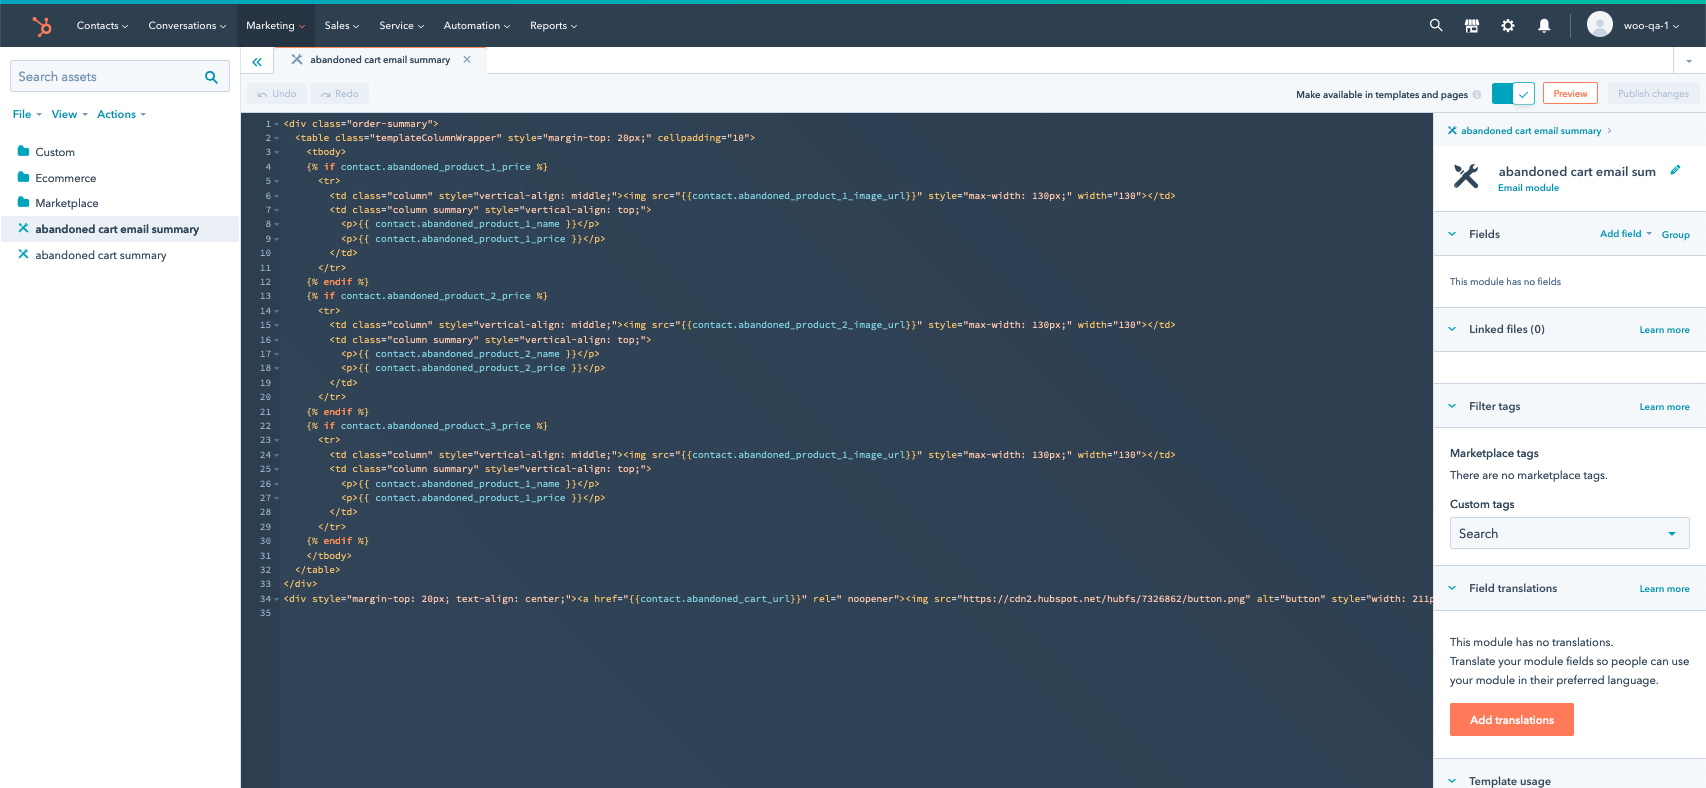
Paste this text into the code editor and publish, be sure to also make sure the toggle 'Make available in templates and pages' is active.
For accounts created after October 29th 2020
<div class="order-summary">
<table class="templateColumnWrapper" style="margin-top: 20px;" cellpadding="10">
<tbody>
{% if contact.unific_abandoned_product_1_price %}
<tr>
<td class="column" style="vertical-align: middle;"><img src="{{contact.unific_abandoned_product_1_image_url}}" style="max-width: 130px;" width="130"></td>
<td class="column summary" style="vertical-align: top;">
<p>{{ contact.unific_abandoned_product_1_name }}</p>
<p>{{ contact.unific_abandoned_product_1_price }}</p>
</td>
</tr>
{% endif %}
{% if contact.unific_abandoned_product_2_price %}
<tr>
<td class="column" style="vertical-align: middle;"><img src="{{contact.unific_abandoned_product_2_image_url}}" style="max-width: 130px;" width="130"></td>
<td class="column summary" style="vertical-align: top;">
<p>{{ contact.unific_abandoned_product_2_name }}</p>
<p>{{ contact.unific_abandoned_product_2_price }}</p>
</td>
</tr>
{% endif %}
{% if contact.unific_abandoned_product_3_price %}
<tr>
<td class="column" style="vertical-align: middle;"><img src="{{contact.unific_abandoned_product_3_image_url}}" style="max-width: 130px;" width="130"></td>
<td class="column summary" style="vertical-align: top;">
<p>{{ contact.unific_abandoned_product_3_name }}</p>
<p>{{ contact.unific_abandoned_product_3_price }}</p>
</td>
</tr>
{% endif %}
</tbody>
</table>
</div>

<div style="margin-top: 20px; text-align: center;"><a style="display:block;max-width:60%;background:lightgray;padding:16px;color:black;text-decoration:none;font-weight:bold" href="{{contact.unific_abandoned_cart_url}}">Return to Cart</a></div>
For accounts created before October 29th 2020
<div class="order-summary">
<table class="templateColumnWrapper" style="margin-top: 20px;" cellpadding="10">
<tbody>


</tbody>
</table>
</div>

<div style="margin-top: 20px; text-align: center;"><a style="display:block;max-width:60%;background:lightgray;padding:16px;color:black;text-decoration:none;font-weight:bold" href="">Return to Cart</a></div>
Now that this is done, you will be able to access this template within the email builder.
Part 2: Create abandoned cart email:
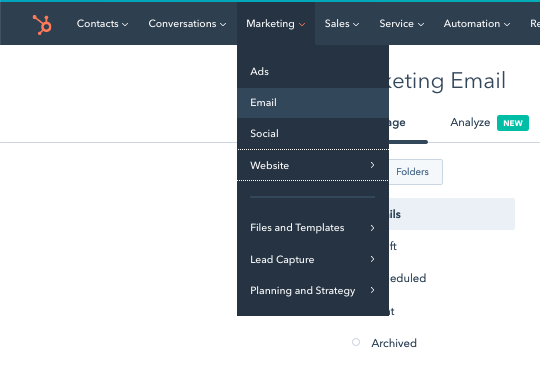
Step 1:
Go to email editor.
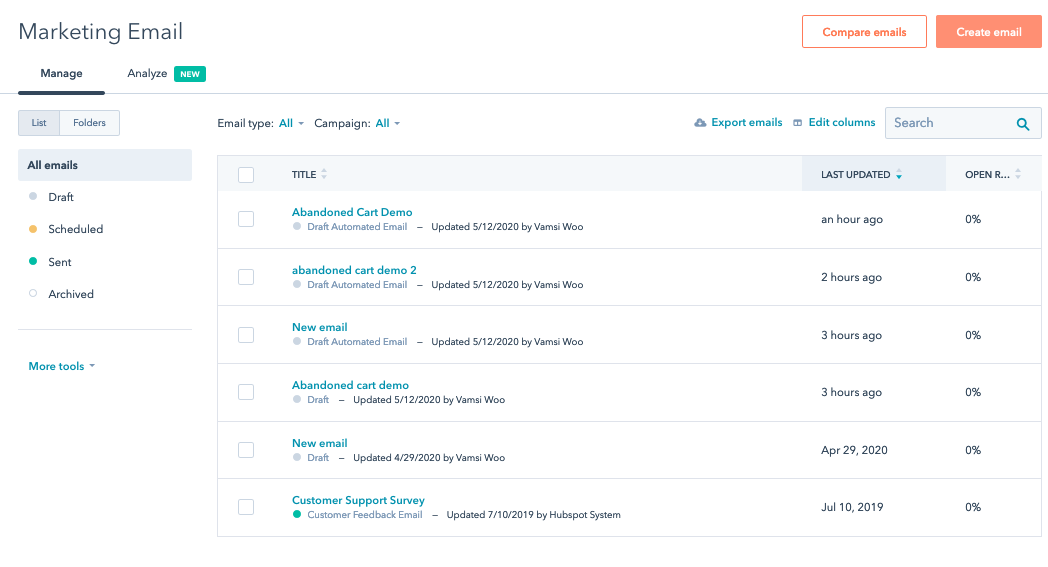
Step 2:
Create email.
Step 3:
Select automated.
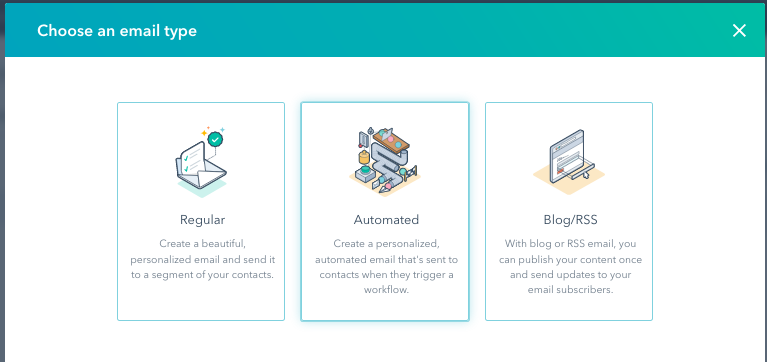
Step 4:
Select start from scratch.
Step 5:
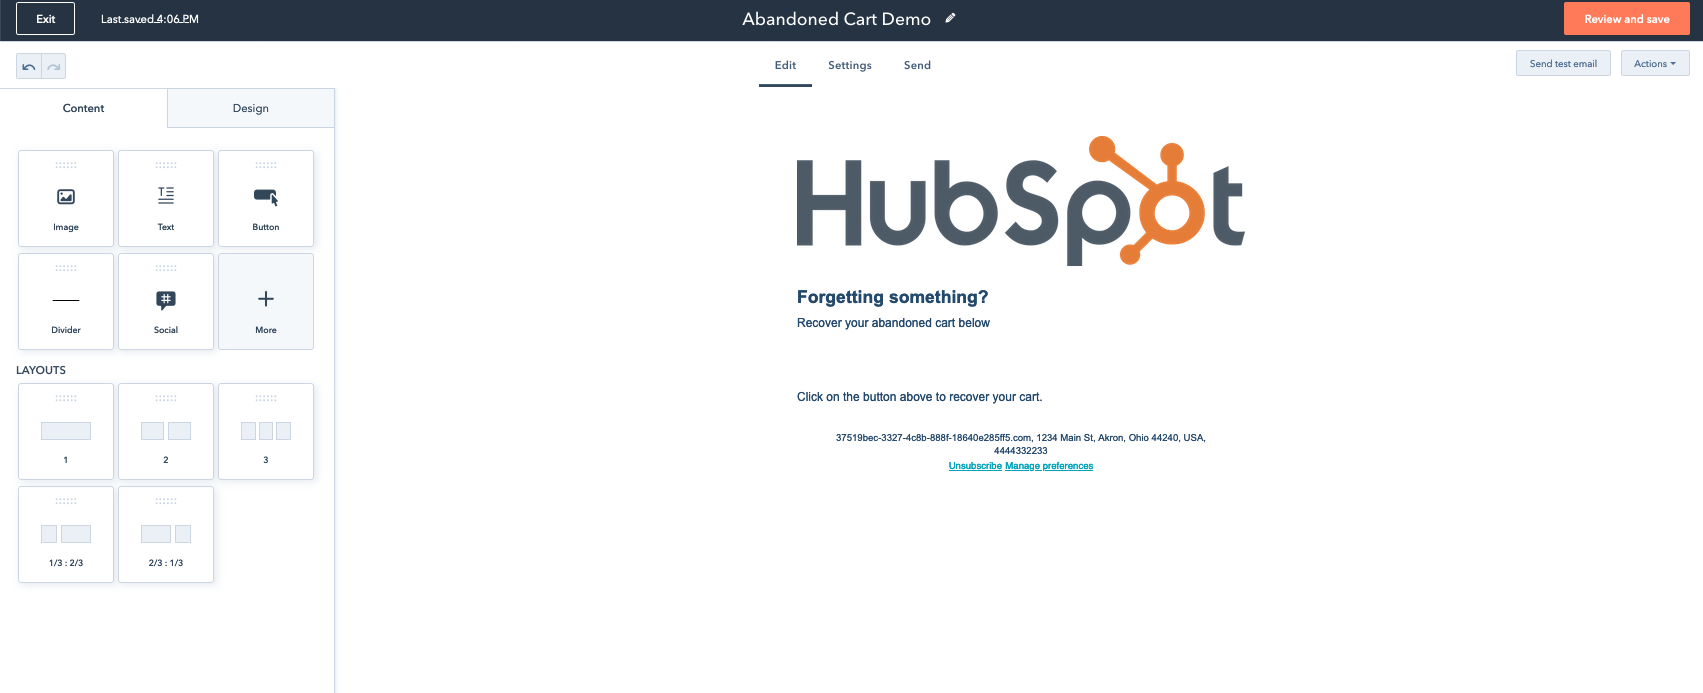
Mock out email.
This step is mostly up to you with how you decide to design your general email. Below I threw together a basic template to serve as our abandoned cart email:
Step 6:
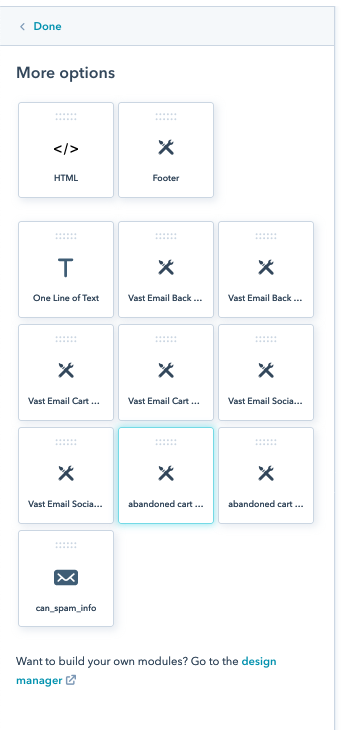
Add the module you created previously.
Under content on the left side click the + more icon and then drag the module that you created using the steps from part 1 into the desired place within your email.
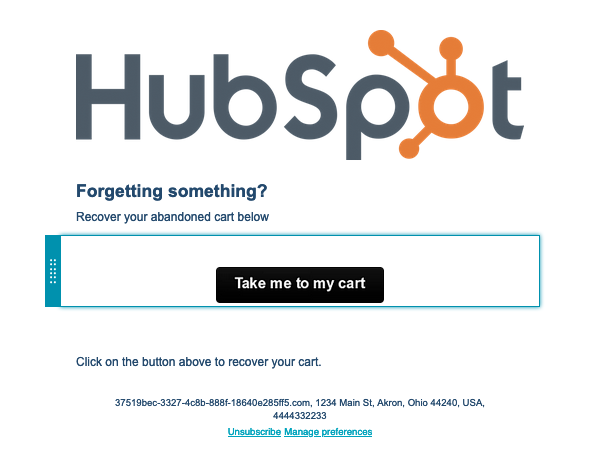
Note: Once added, you will only see the "Take me to my cart " button.
Do not worry, as the products will populate when you preview the email with a contact that has abandoned cart properties (if you don't have any contacts in HubSpot with abandoned cart properties, you will need to create a test abandoned cart using the steps in this document: https://help.unific.com/how-to-test-abandoned-cart)
Step 7:
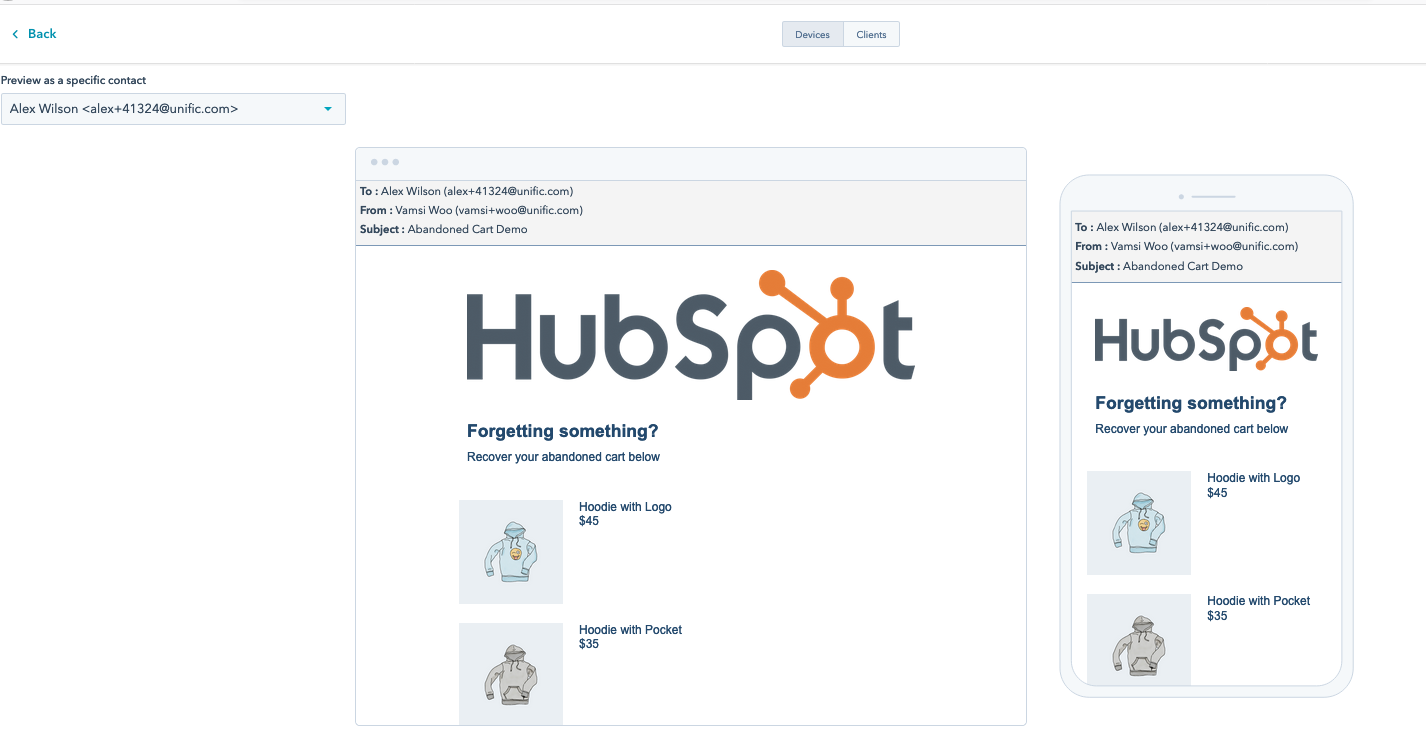
Preview using customer with an abandoned cart.
Be sure that the preview contact has an active abandoned cart or else no data will show in the email.
Part 8:
Publish!
Your abandoned cart email is now published and you can use it as you please!
Final note:
If there is anything else that you think should be added to this article, please message into Unific support and let us know!