Abandoned carts are an e-commerce merchants daily challenge. HubSpot helps you face it through automating the emails a client would receive once they abandon a cart, but even a tool as strong as HubSpot, can be improved.
The product to get your abandoned cart data in HubSpot
The first step to doing so, is our Unific Sync product, which includes over 140 properties synced to both contact and deal record, over 10% of which are details of a customers’ abandoned carts. The most important properties to know:
We save line items in the deal record and up to 3 product URL’s in the contacts in order to have a way to dynamically show them in each email sent.
In this article we will walk through creating the workflow and the custom modules needed for it to work.
*Default HubSpot modules will not work for any third-party app.
Choosing your type of workflow
The first step in creating a workflow is going to your Automation tab on the top toolbar in your HubSpot portal. Depending on your HubSpot plan some features may be limited.
There are two types or workflows, each with its own advantages and disadvantages.
Contact based workflow
Advantages
- Prevents double enrollment for a contact with more than one deal that is abandoned
- Allows you to set up and track goals, measuring conversions and success inside each workflow
- Used and relies on tools that are not beta products
Disadvantages
- Is triggered after deal creation, when a contact property is updated in the backend
- Revenue cannot be specifically attributed to each deal
- Only allows up to 3 abandoned products to show in each email sent
Deal based workflow
Advantages
- Allows concurrent enrollment of more than one abandoned cart deal
- Is triggered by deal creation, and deal stage ABANDONED being reached.
- Revenue is attributed to each deal through attribution reporting outside the workflow (reports must be created manually)
Disadvantages
- Does not allow for goals to be set up and measured inside the workflow, only un-enrollment triggers
- Display of line items when there are variants and currencies can be limited
- Depends on a beta feature
How to create a contact-based emails + workflow.
In order to have emails that show the desired products, the first steps will be to create our custom code module. To do so, please follow these steps:
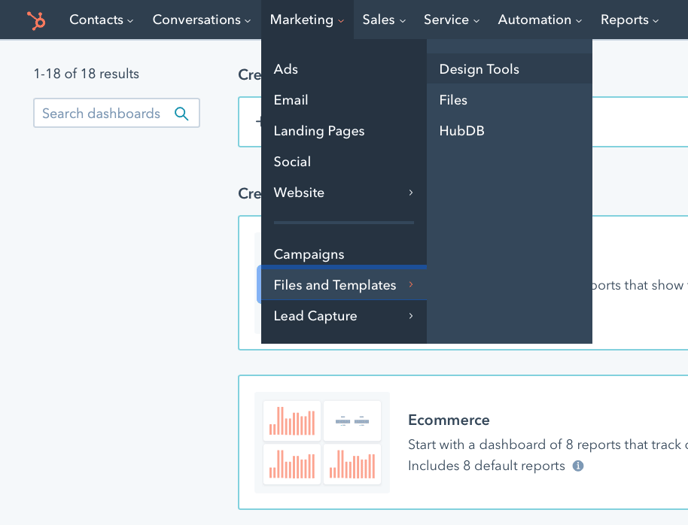
- Open the Marketing tab
- Go to Files and Templates
- Choose Design tools
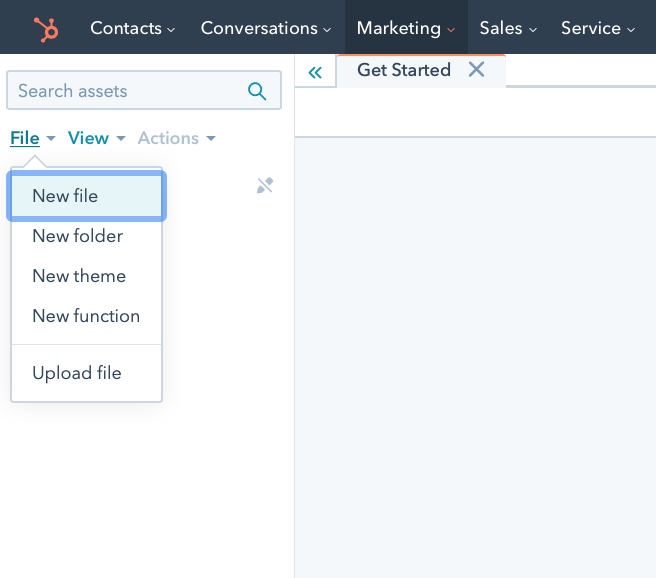
4. On the left-hand panel, chose NEW + FILE
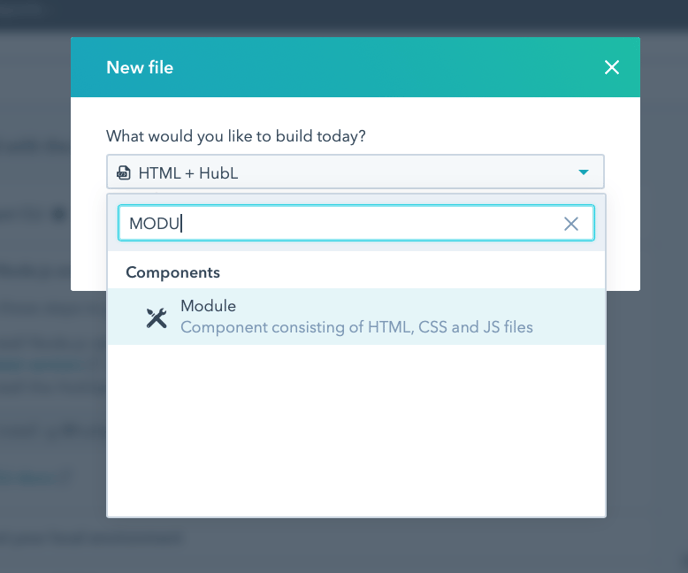
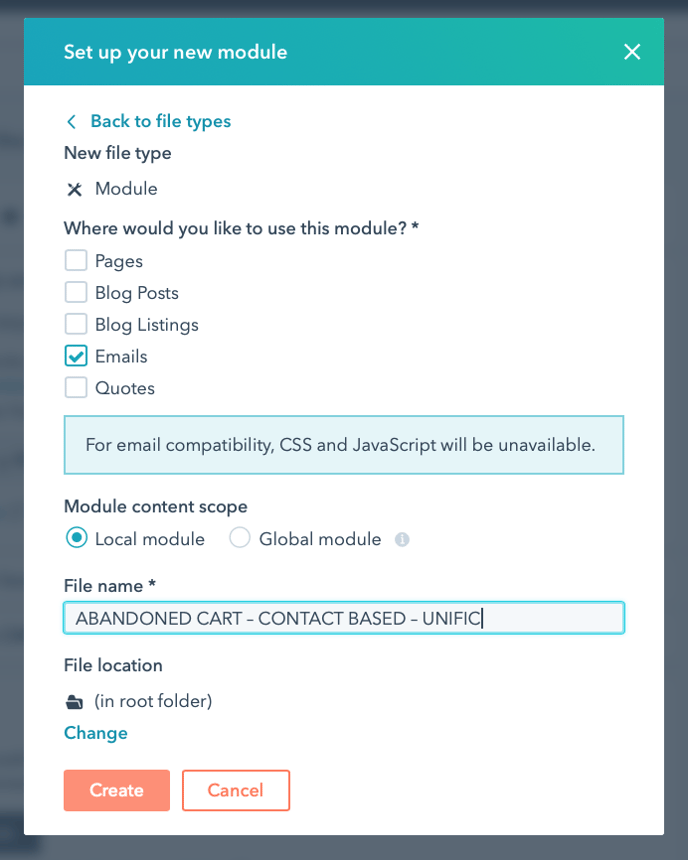
5. Chose module and give it a name, we recommend:
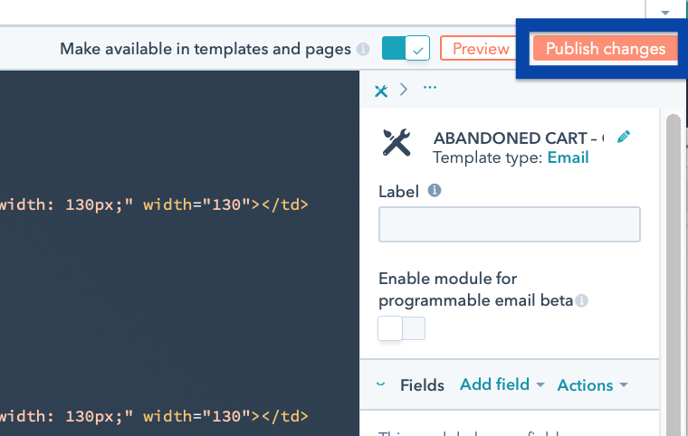
ABANDONED CART – CONTACT BASED – UNIFIC
6. Open this module file and copy and paste the code from it into the new module.
7. On the right-hand panel choose PUBLISH CHANGES
Creating your email to be sent out
The next step is to create the emails that your clients will receive upon abandoning a cart, this is where we will include the module.
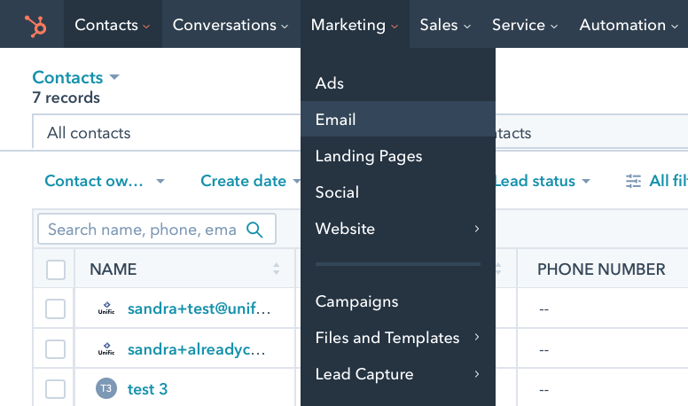
- Open the Marketing tab and go to emails
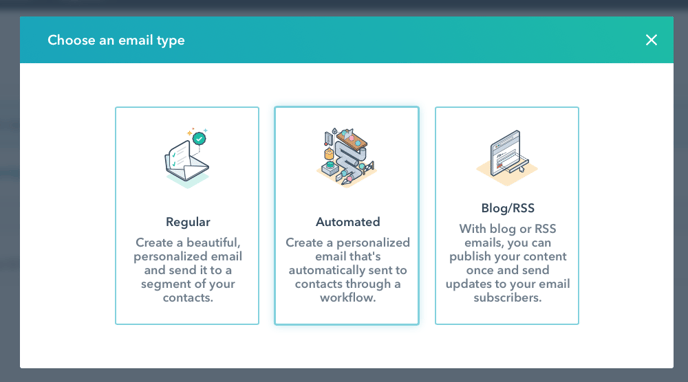
2. Create a new automated email in the drag-and-drop editor
3. On the left-hand side panel, choose the MORE option
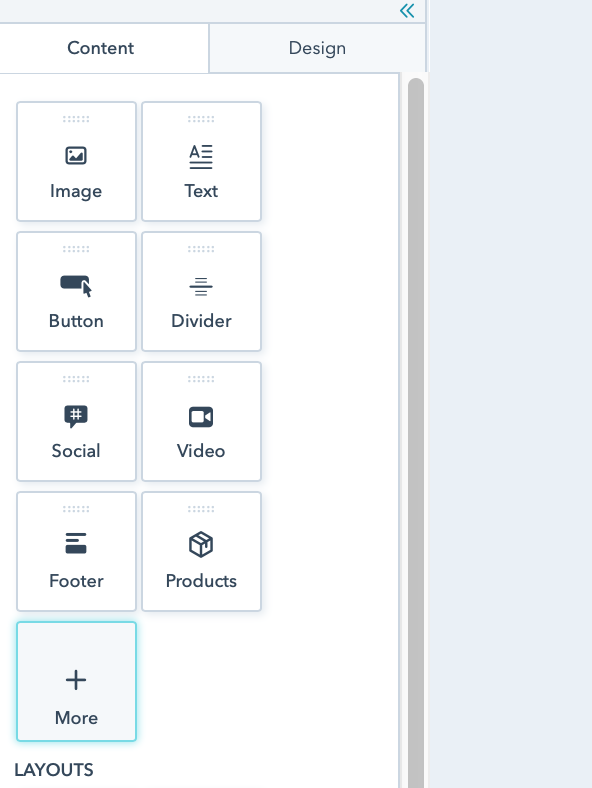
4. Find the new module we created and drag it into your email template
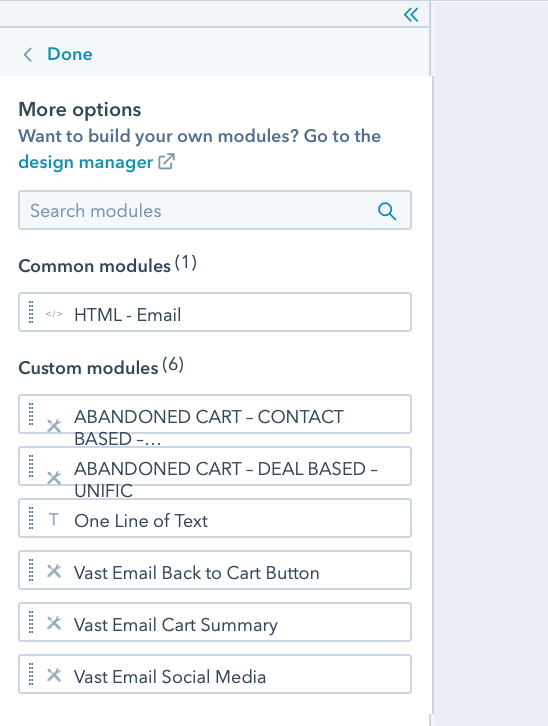
*When you drag it will look empty inside the email, that is normal behavior for this type of module. This is why to try it you must to go preview.
5. Test it using the PREVIEW tool or send a test email.
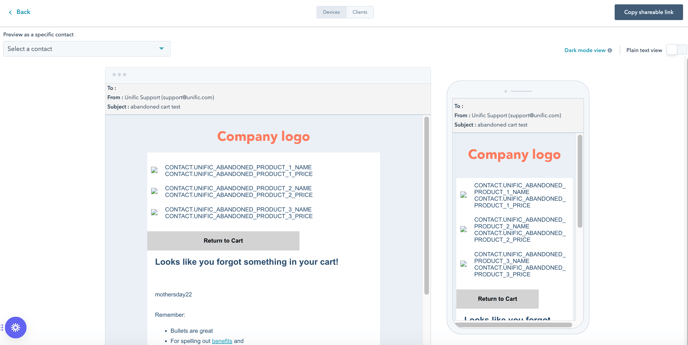
*Make sure you use a contact that has a current abandoned cart, otherwise it will be empty.
Best Use Recommendations
For best practices, we recommend creating 3 to 5 follow-up emails in an abandoned cart sequence over the spread of 10 to 30 days. This can depend on your type of product and the average time to purchase. The goal is to increase the chances of an abandoned cart becoming an order.
Fun fact: we have seen conversions all the way up to the fifth email.
Creating the workflow to automate email send out
Once you have written your emails and included the module in all of them, make sure they are published.
Now it's time to continue with our workflow creation.
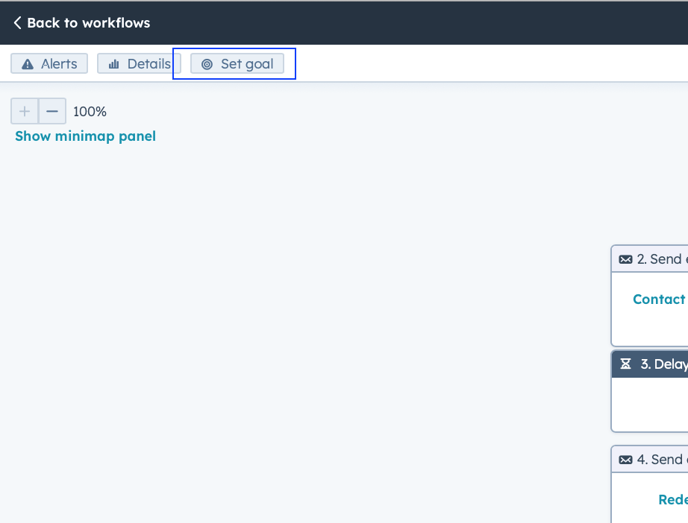
- Open the Automation tab
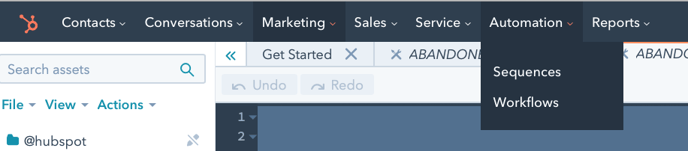
- Create a new contact workflow from scratch
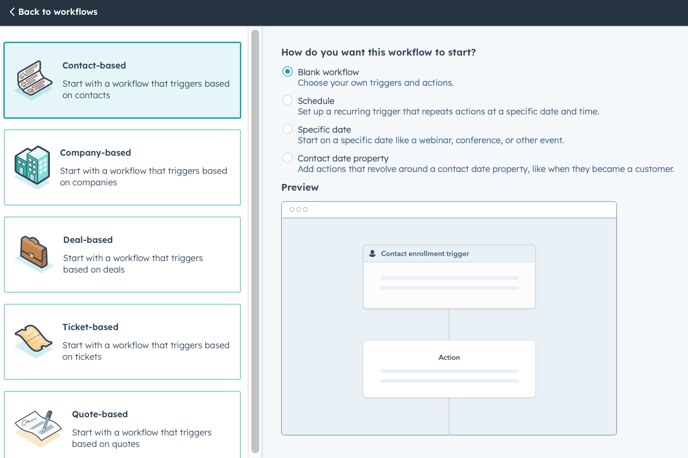
3. Set the basic triggers in the following way:
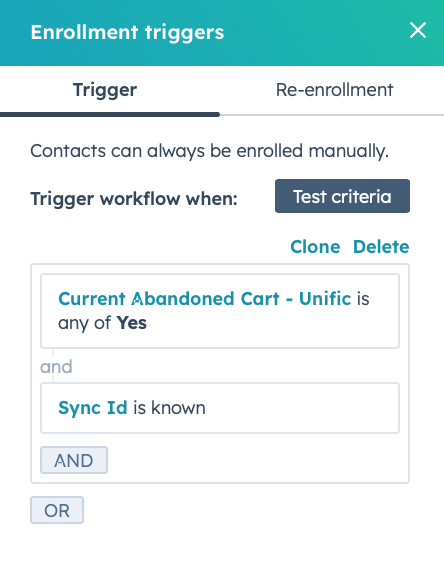
The first trigger is the property SYNC ID being known to ensure the contacts enrolled were created by UNIFIC.
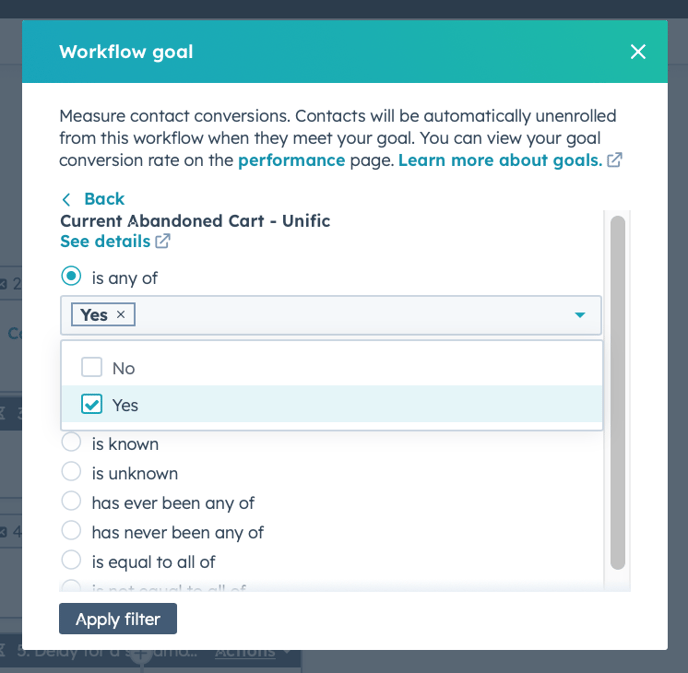
The second trigger is a property that constantly updates depending on deals, CURRENT ABANDONED CART must be set to IS ANY OF: YES.
This ensures contacts with older abandoned carts that did not convert will not be enrolled.
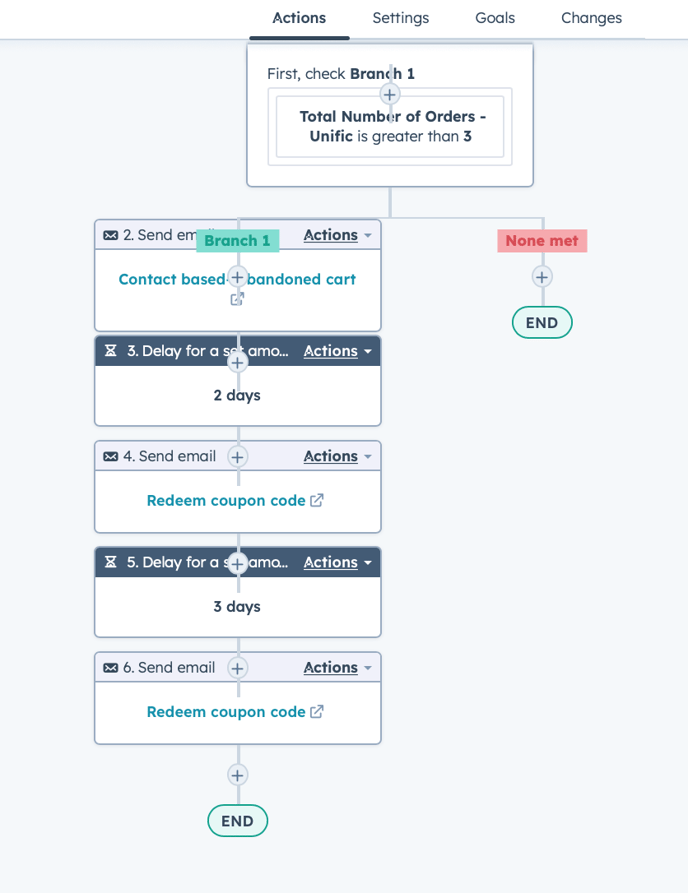
4. Set an if and then statement based on segmenting practices
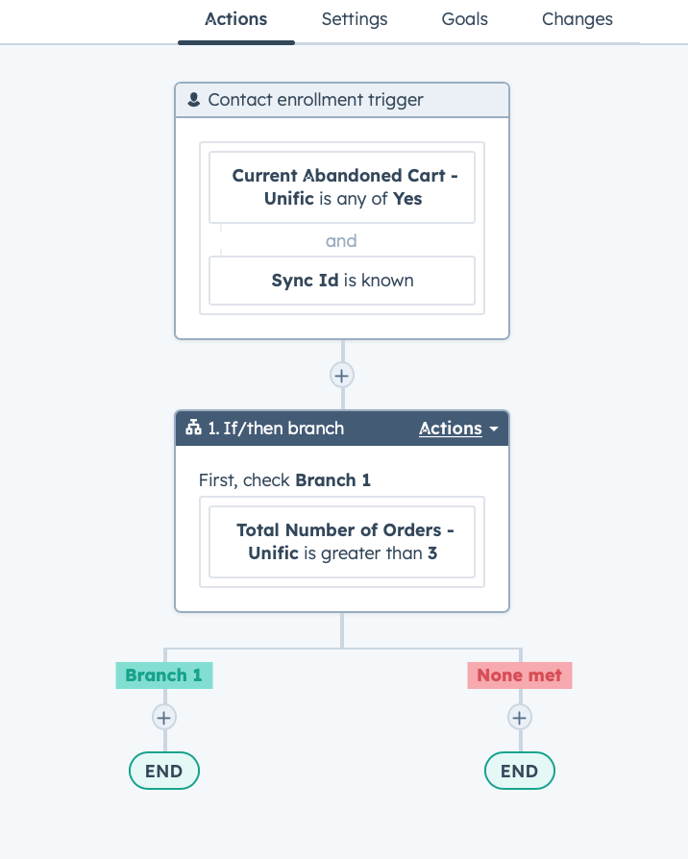
If you have segments built through lists, this is where you can define how will you approach each customer differently. Our general recommendation is to provide a discount from the very first email to newer clients but not for recurring ones.
Properties like AVERAGE ORDER AMOUNT, NUMBER OF PURCHASES can help you segment if you don’t already have lists defined.
Our Dynamic Segments product was created to do this for you, creating a property called UNIFIC DYNAMIC SEGMENTS that will read: New Customer, Promising, Big Spender, Loyalist or Champion. This is what you can see in our screenshot.
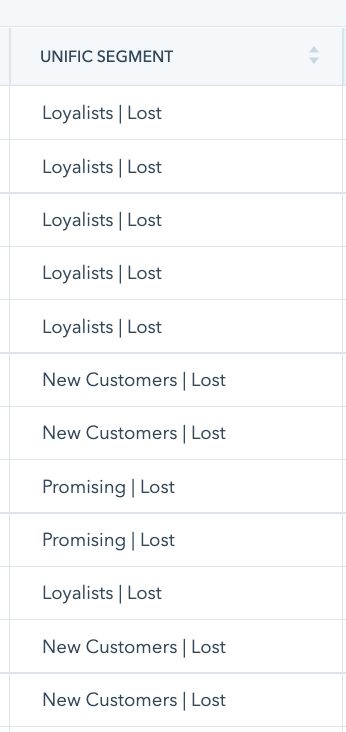
*Dynamic segments is a separate product not included in the subscription for the UNIFIC SYNC product.
5. Include the emails and set delays between them. This can depend on the type of product, but set at least 2 to 3 days between them is standard practice.
6. Now it’s time to set a goal. On the left-hand side, on the grey tool bar go to VIEW OR SET GOALS. This will determine what needs to happen to measure success but also, to make sure that once it happens, clients don’t get any more unnecessary emails. In this case the goal is CURRENT ABANDONED CART is any of NO.
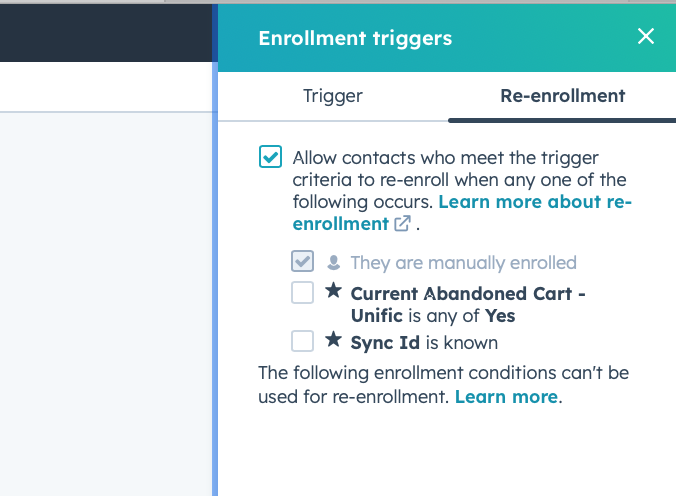
7. Now go to the trigger and set re-enrollment criteria to allow every type of re-enrollment and you are done.
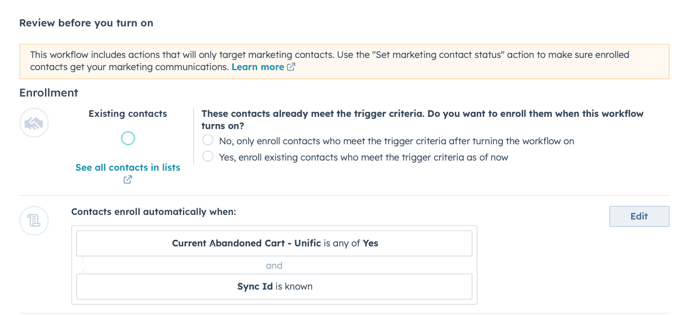
8. Turn it on and chose if you want clients from before to be enrolled as well or if you only want it working from the moment you turn it on, into the future.
That is it! You have built a custom module, an email, and a workflow to send out abandoned cart reminders.
Trying to achieve at least 10% in recovery can be great for your revenue, especially considering abandoned carts are usually money left on the table that is not particularly hard to recover once you have a strategy and the tools to automate, measure and optimize.