Overall process for setting up WooCommerce
- Sign up for Unific at https://app.unific.com/signup
- Authenticate WooCommerce with Consumer Key and Consumer Secret
- Enable Legacy API
- Install the Unific Wordpress Plugin (extension)
- What to do if you have multiple environments.
- Connect WooCommerce if you already have a Unific account
- Troubleshooting
------------------------------------------------------------------------------------------
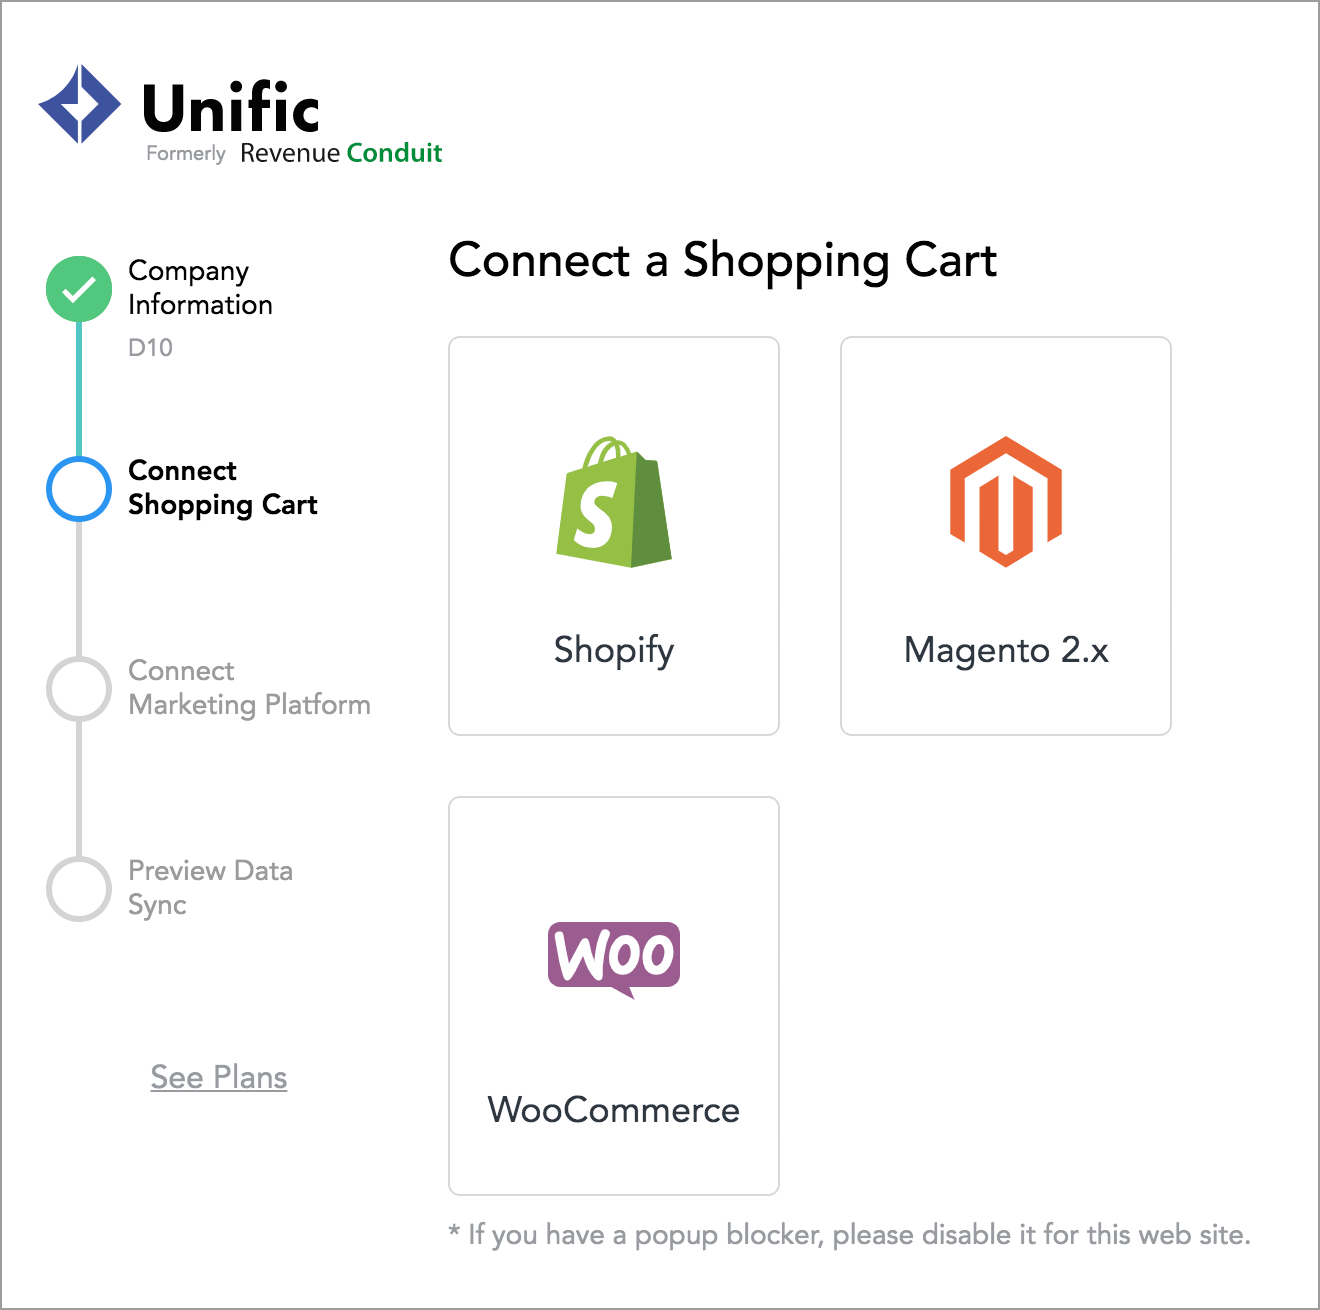
Sign up for Unific
- Sign up for a Unific account at https://app.unific.com/signup
- Fill in your Company information
- Select WooCommerce as your shopping cart
Authenticate WooCommerce with Consumer Key and Consumer Secret
3. A pop up will appear. If it doesn't appear you might have a popup blocker. Please disable it for app.unific.com.
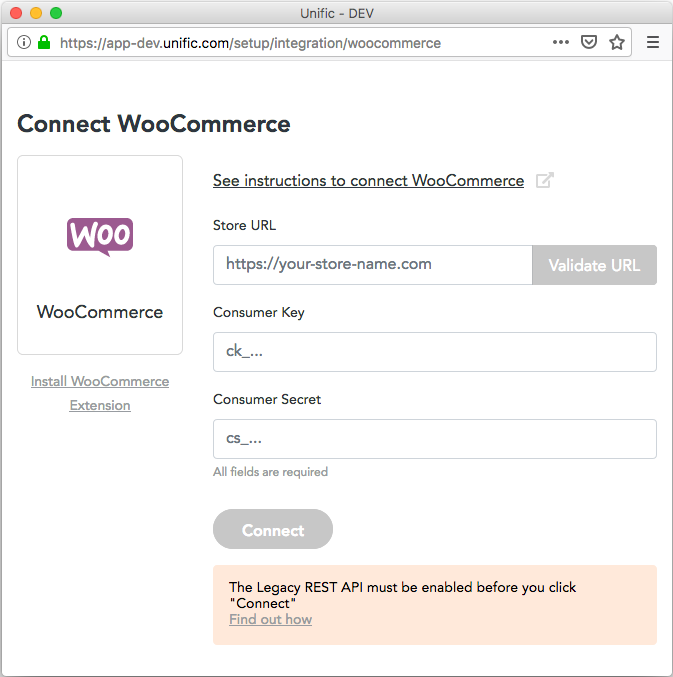
4. Fill in your WooCommerce Store URL and click the "Validate URL" button. The URL must be validated before you can continue.
5. Next fill in your Consumer Key and Consumer Secret. Below are the instructions on finding your Consumer Key and Consumer Secret.
- Open a new browser tab/window and be sure to keep the current tab open so that you can come back to it.
- Log in to your WooCommerce administration section.
- Navigate to the WordPress user administration screen by clicking on "WooCommerce" in the WordPress main menu and select "Settings"
- Once on the edit user screen, select the "Advanced" tab then click on the "REST API" icon next to webhooks.
- Click on the "Add Key" Icon
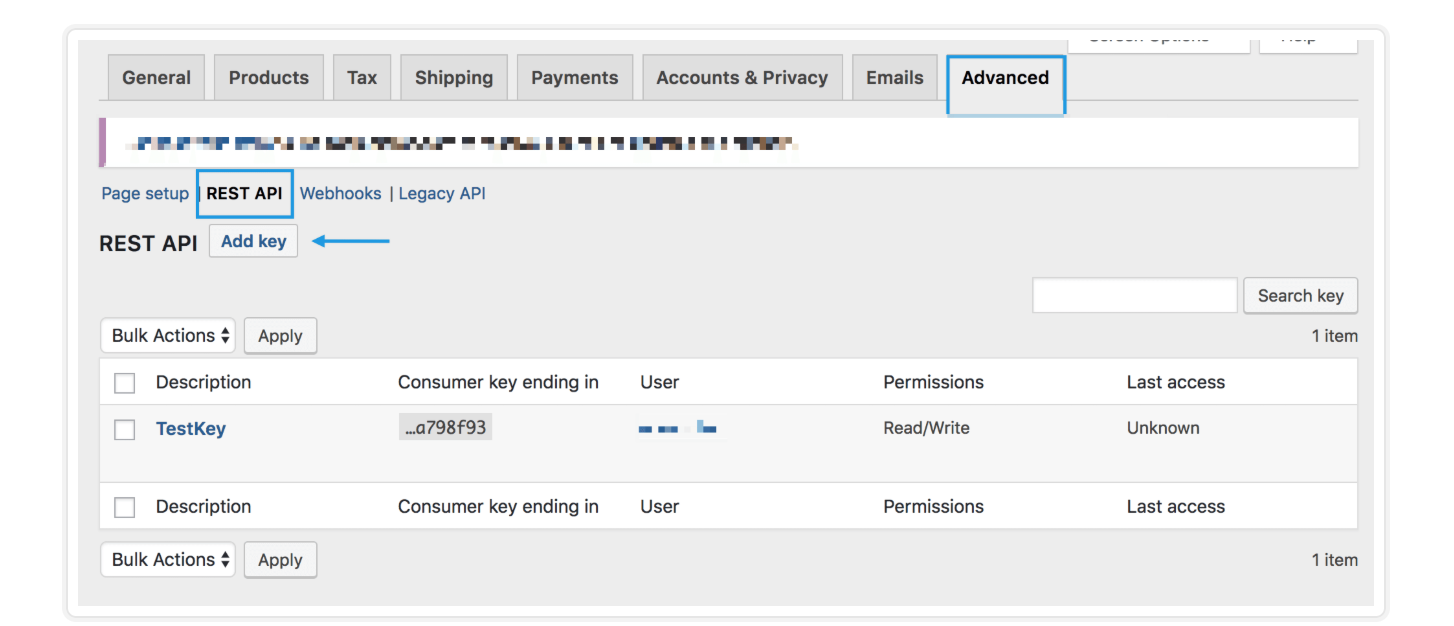
=========================================================================
Note: Keys/Apps was found at WooCommerce > Settings > API > Key/Apps prior to WooCommerce 3.4 =========================================================================
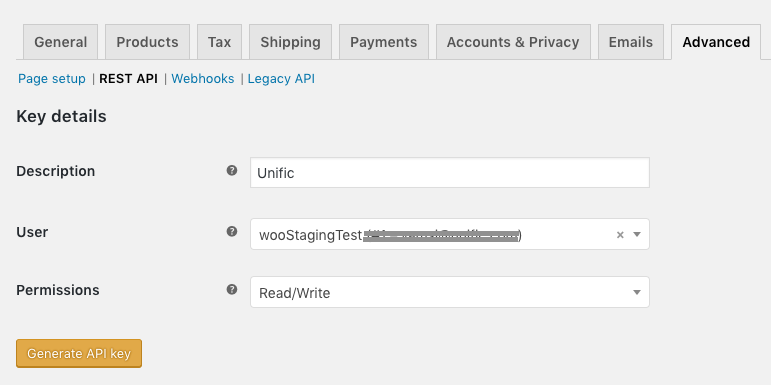
- When you are prompted to add a key, you will be asked for a number of details:
- Add a Description (we recommend labeling as Unific)
- Select the User you would like to generate a key for in the dropdown.
- Select a level of access for this API key — Read access, Write access or Read/Write access.
Important: Please make sure to give Read/Write access to Unific user in order to write the webhooks to your WooCommerce store without which the sync may not be guaranteed. - Click Generate API Key, and WooCommerce creates API keys for that user.
- A new screen will pop up that will display the Consumer Key and Consumer Secret
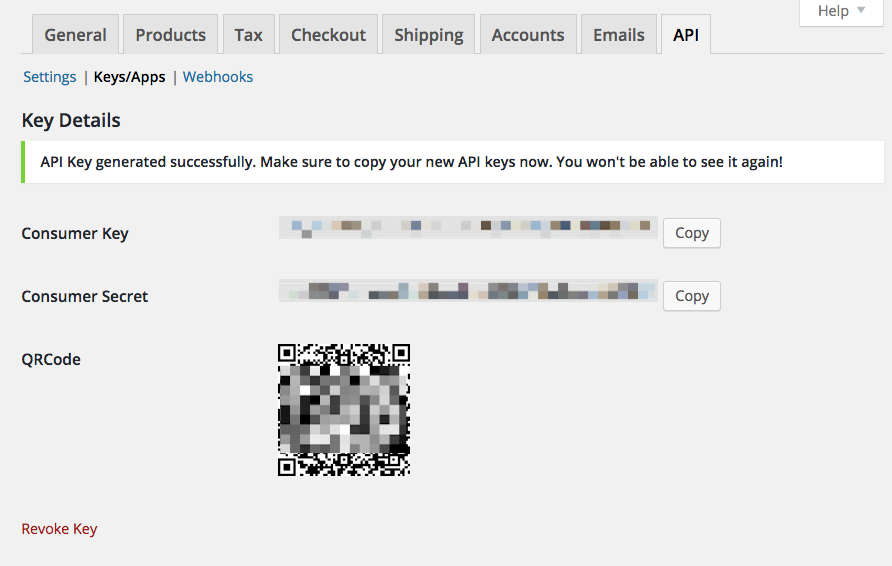
- Copy and paste the Consumer Key and Consumer Secret respectively into the Unific popup that asked for the Consumer Key and Consumer Secret
- Click the "Connect" button on the Unific popup
- Unific will now attempt to connect and show a success message
------------------------------------------------------------------------------------------
Enable Legacy API
Enable the REST API within WooCommerce:
- Visit the WooCommerce > Settings > General tab
- Check the Enable REST API checkbox.
- Click "Save changes"
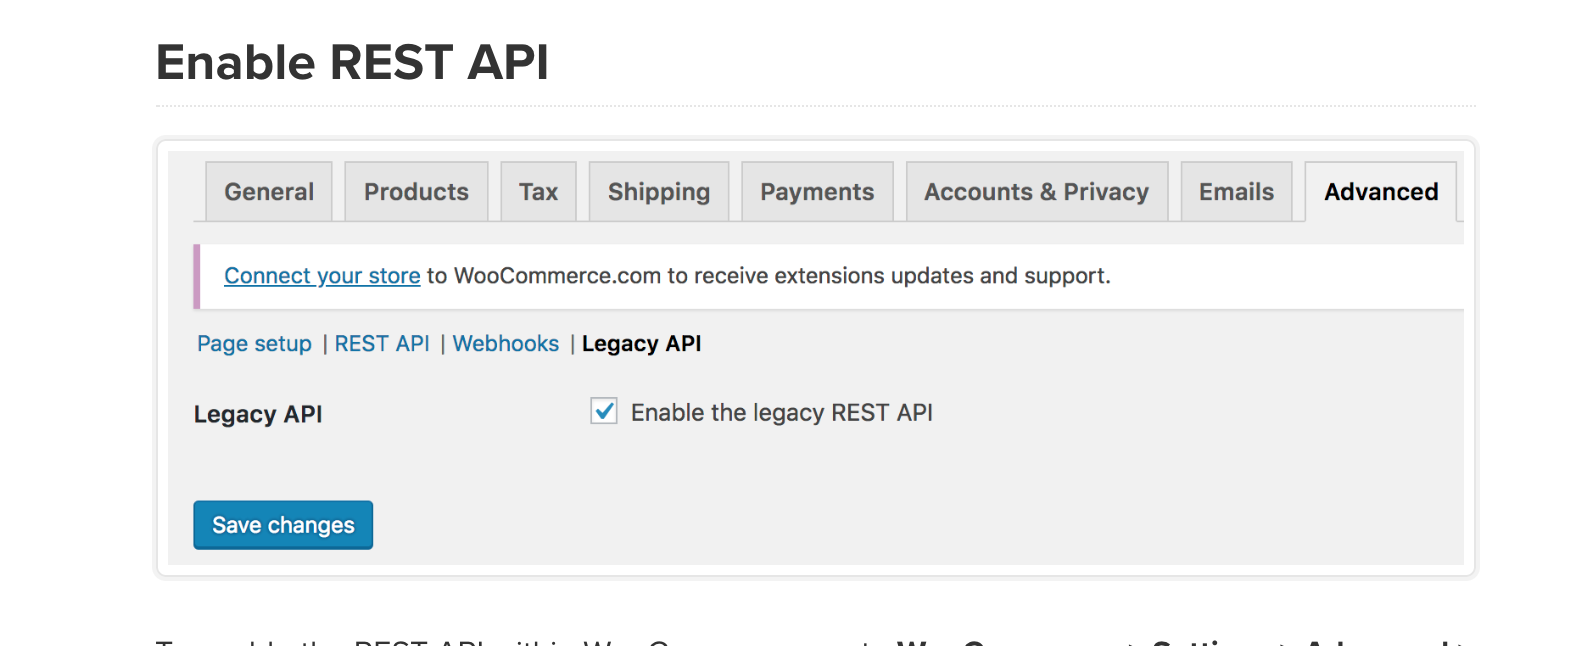
If you do not enable the REST API, no order data will sync to your Hubspot portal
------------------------------------------------------------------------------------------
Connect HubSpot
- After you've connected WooCommerce during the signup process, you will be prompted to select HubSpot.
- Click the HubSpot icon and a popup will appear
- There you will be able to authenticate
---------------------------------------------------------------------------------------------
Install the Unific Wordpress Plugin (extension)
Unific WooCommerce plugin installation steps
- Follow these instructions to download and install the Unific WooCommerce plugin
- Follow these instructions to install the HubSpot UTK submission script
NOTE: If you do not install the Unific Wordpress Plugin (Extension), Abandoned Cart data will not sync to HubSpot
------------------------------------------------------------------------------------------
What to do if you have multiple environments
It is often the case that there are multiple environments like Dev, QA, Staging, and Production for WooCommerc 2 stores.
If you would like to test Unific on environments other than production you may add multiple stores within a single Unific account and connect them to a single HubSpot portal.
If you do have multiple environments, you must connect Unific to the desired environment that you want to test in. that you want to test and go through the "Authenticate WooCommerce with Consumer Key and Consumer Secret" process above.
------------------------------------------------------------------------------------------
Connect WooCommerce if you already have a Unific account
- Log in to your Unific account at https://app.unific.com
- After you log in, click on the (+) Connected accounts icon
- Select the "Add Account" tab
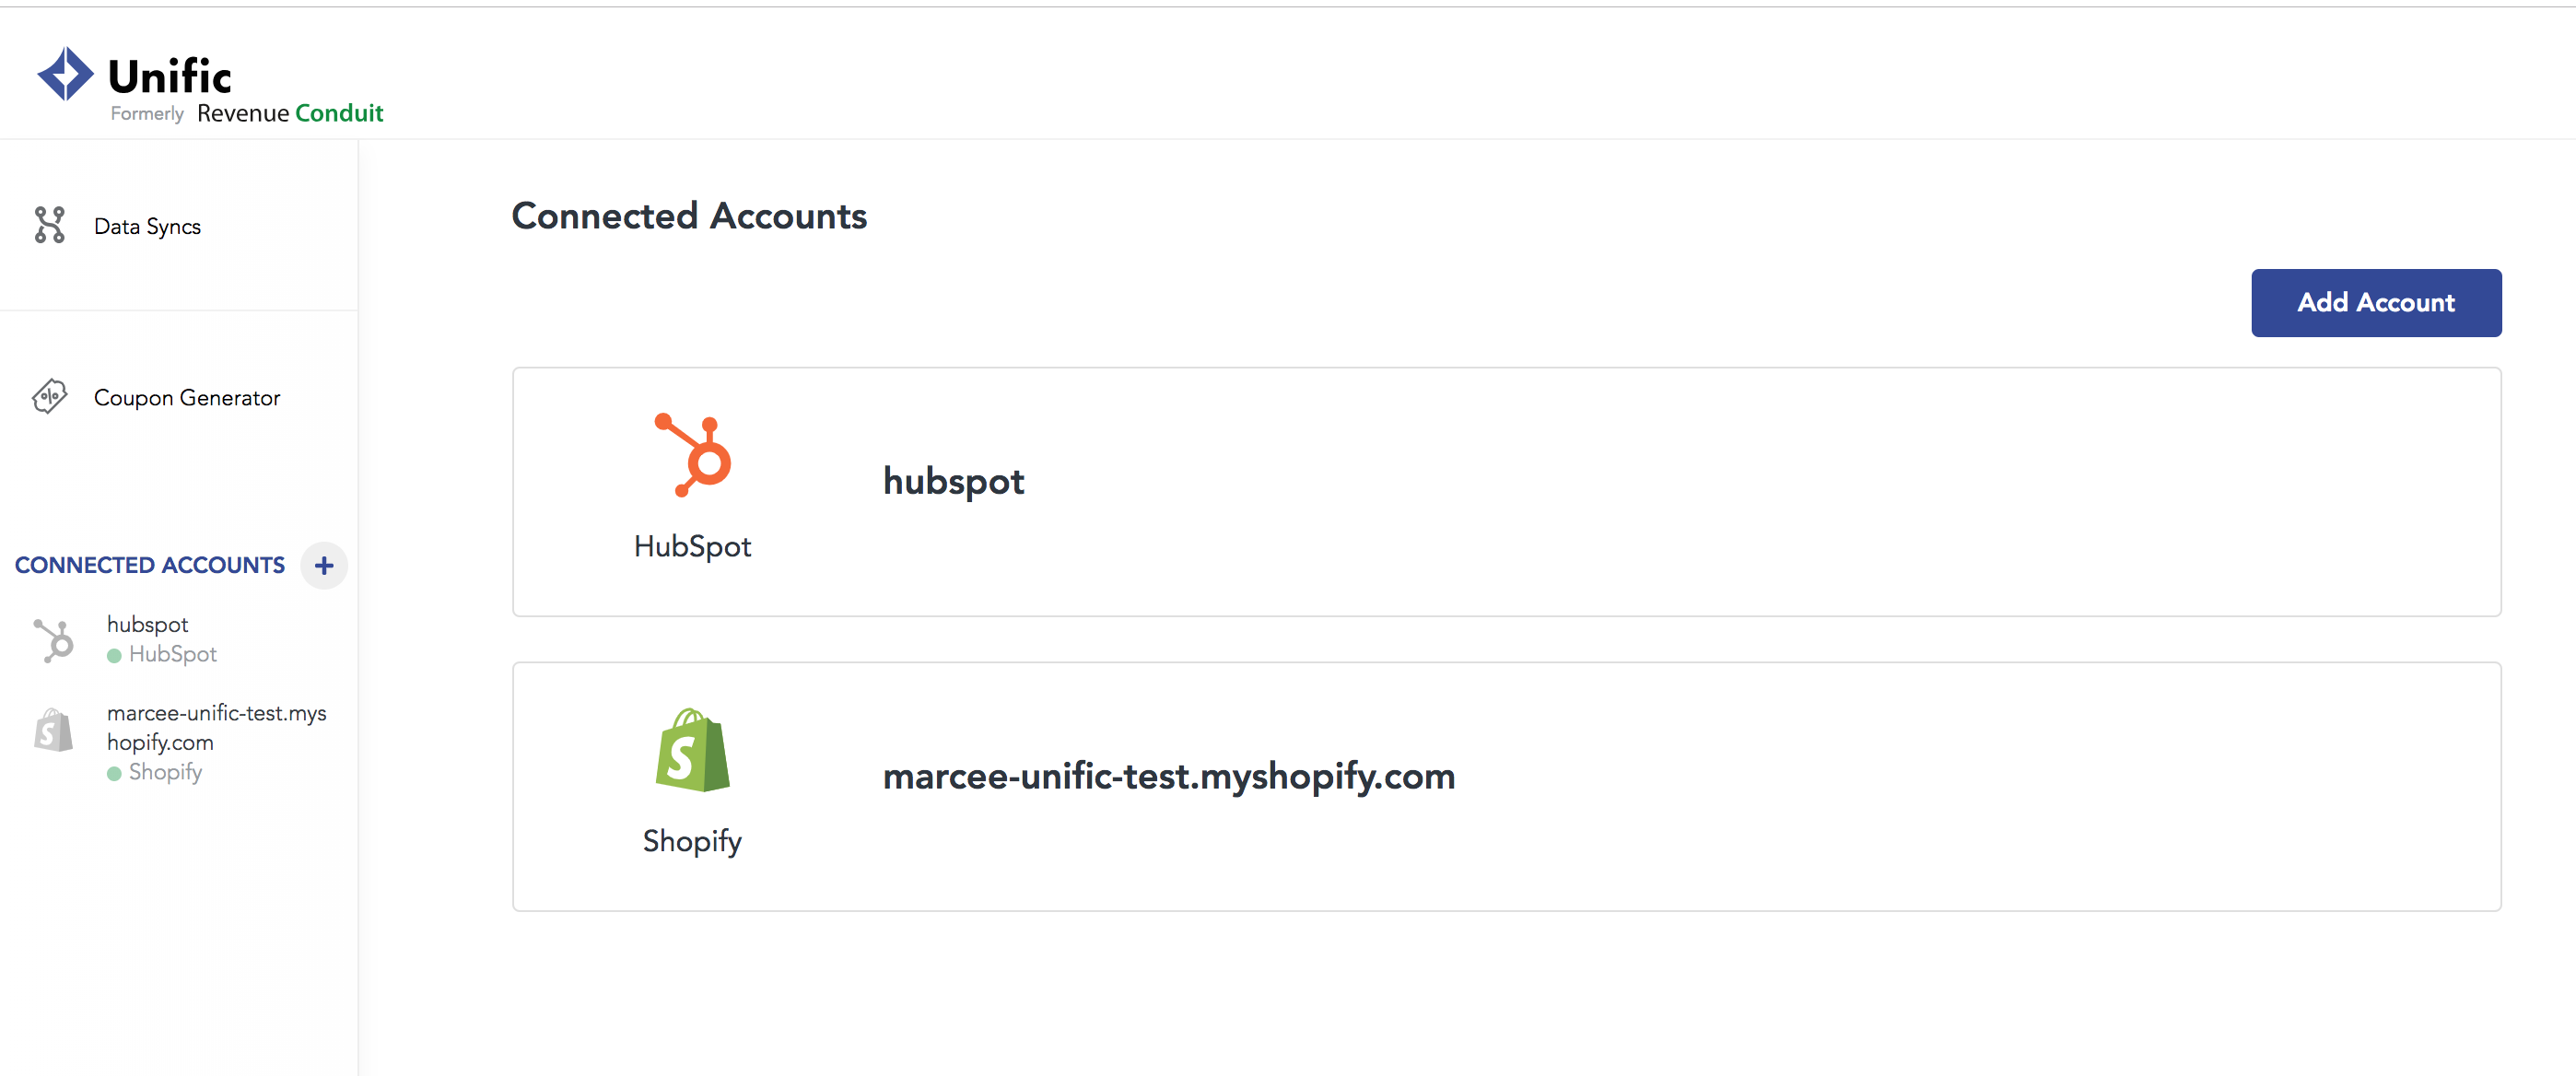
3. Click on the WooCommerce shopping cart
4. You will now see the popup from the "Sign up for Unific" section above. Follow the instructions from there.
------------------------------------------------------------------------------------------
Troubleshooting
Please check the following items if you get an error inside of Unific after you enter the WooCommerce Consumer Key and Consumer Secret.
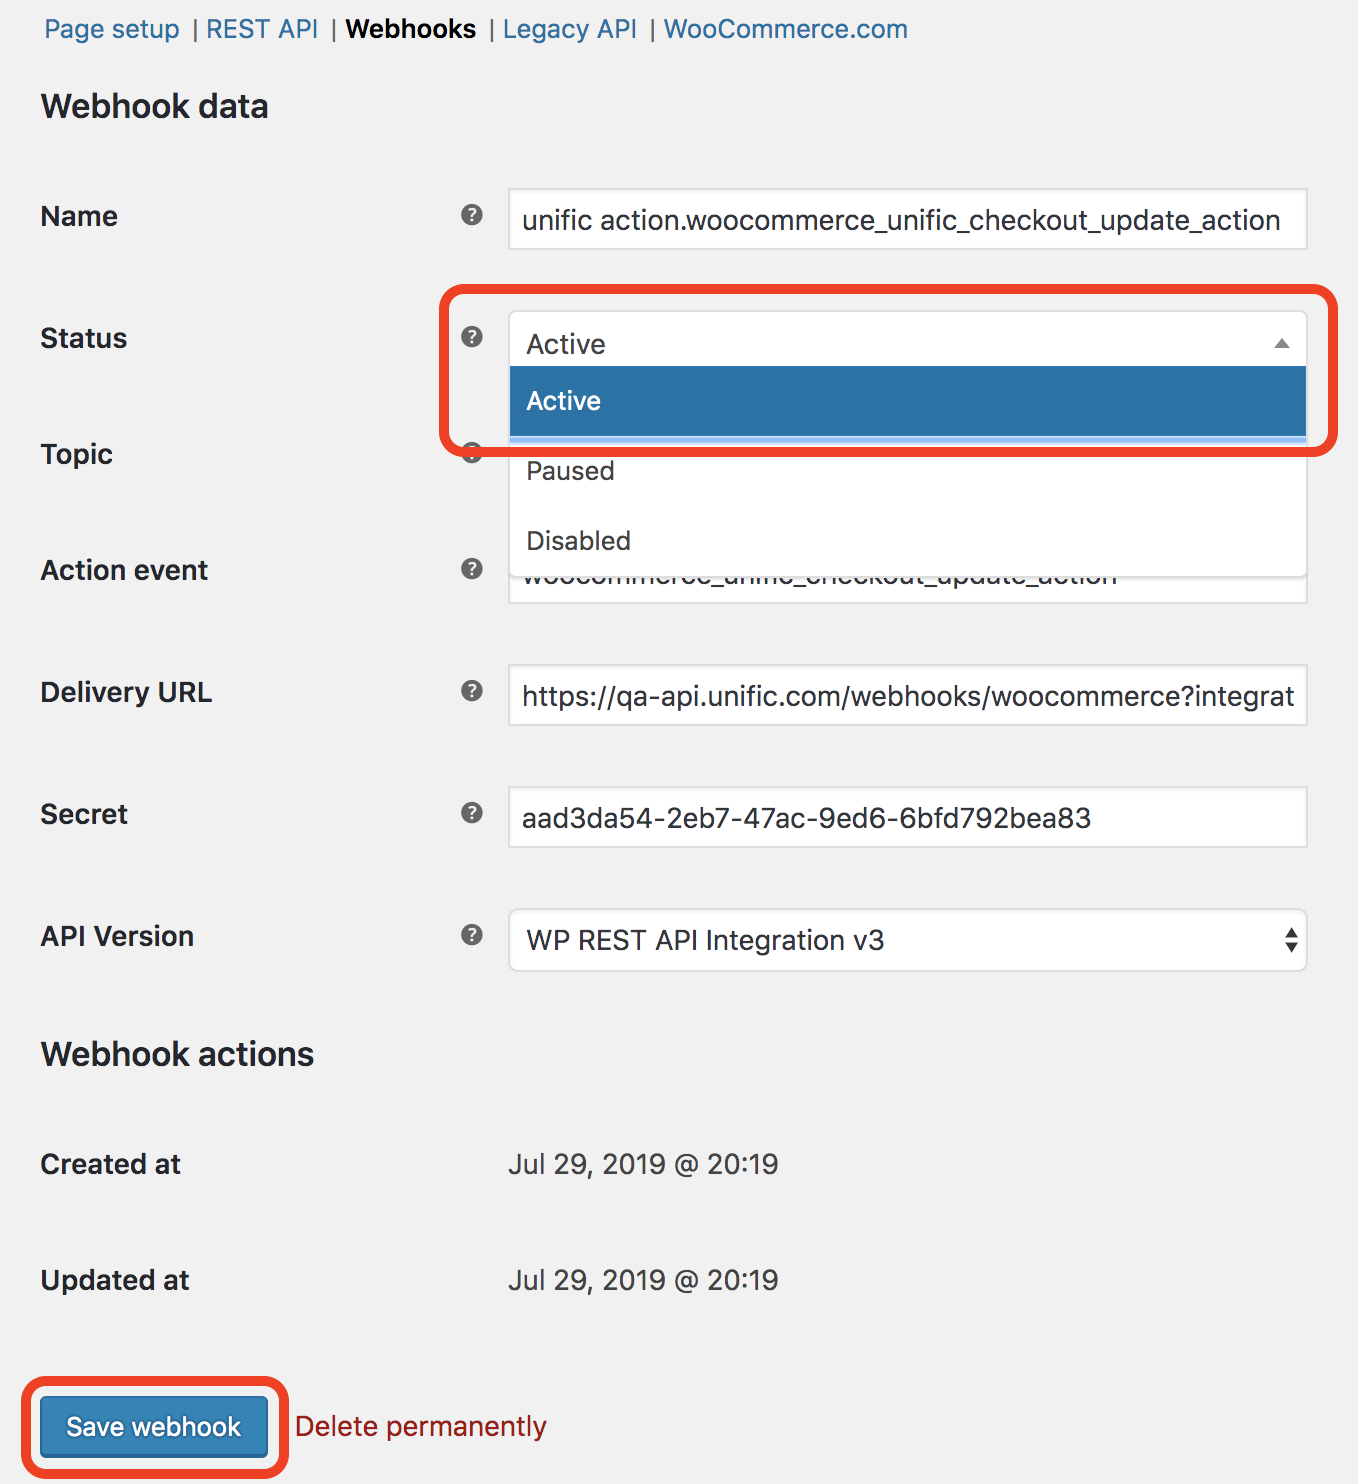
How to enable disabled webhooks
- Navigate to the Webhooks section of your WooCommerce admin (Woocommerce<Settings<Webhooks) and edit the desired webhook.
- Set status to active and save.

Website URL
- Confirm that the website URL is the root of your WooCommerce web site. No sub pages.
Version
- Unific supports versions WooCommerce 2.2 or newer
- If you have an older version of WooCommerce (older than 3.5.x), then the WooCommerce REST API must be enabled. See section above "If you have a WooCommerce version older than 3.5.x" for how to enable the REST API.
Whitelist
- If your server blocks external requests using a whitelist, you must add Unific's IP addresses for whitelisting.
- Please contact support@unific.com to get a list of Unific's IP address to whitelist so that your developer or server administrator can whitelist them
Other
- Pretty Permalinks must be enabled. (Note: They are probably already enabled. Learn More).
- If you receive JSON error then you can try this URL format or